
Publish your first API product
Use one endpoint, one origin, and a free BASIC plan to import, grant access, test, and publish.
On this page
Before you start
- Your merchant email is verified.
- You control a public HTTPS API. This example assumes GET /health returns HTTP 200 with {"status":"ok"}. If your API differs, replace the example path and response.
1. Describe your product
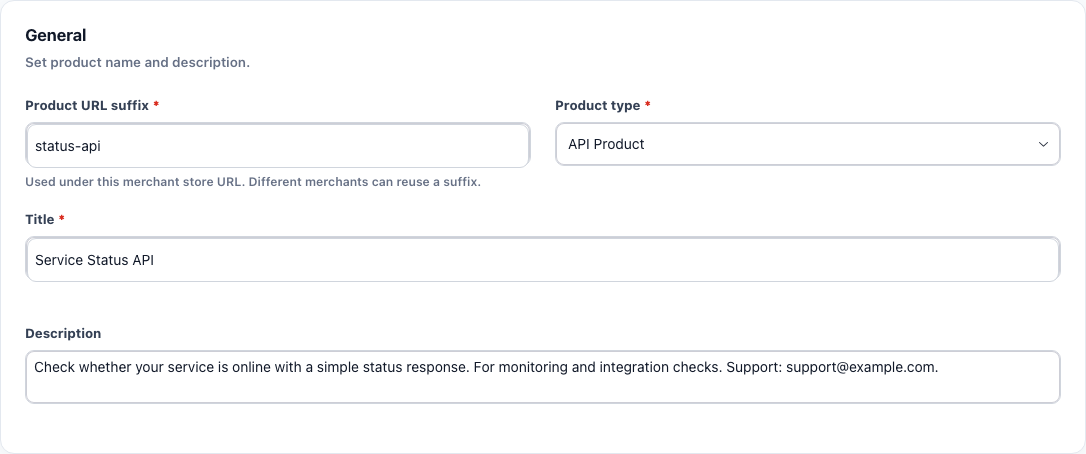
- Open Products → New product. Under General, choose API product.
- For example, use status-api as the product URL suffix, “Service Status API” as the title, and describe what the API returns, who it is for, and how to contact you.
2. Import the API document and connect your origin
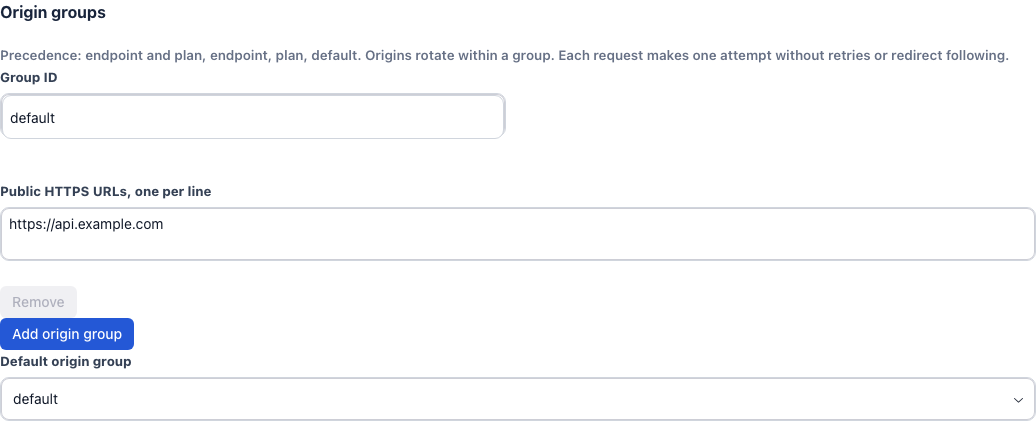
- Open Endpoint. In the default origin group, enter your HTTPS base URL, such as https://api.your-domain.com. This is a placeholder: replace it with your own reachable origin.
- Paste the YAML below into OpenAPI document, or save it as status-api.yaml and upload it with Import JSON or YAML. Keep default as the default origin group and leave routes and transformations empty.
- Select Save draft. After saving, Parsed endpoints should include GET /health. Your API handle comes from your store handle; there is no separate domain to enter.
openapi: 3.0.3
info:
  title: Status API
  version: 1.0.0
paths:
  /health:
    get:
      operationId: getHealth
      summary: Check service health
      responses:
        '200':
          description: Service is healthy
          content:
            application/json:
              schema:
                type: object
                properties:
                  status:
                    type: string
example: ok3. Give BASIC access to the endpoint
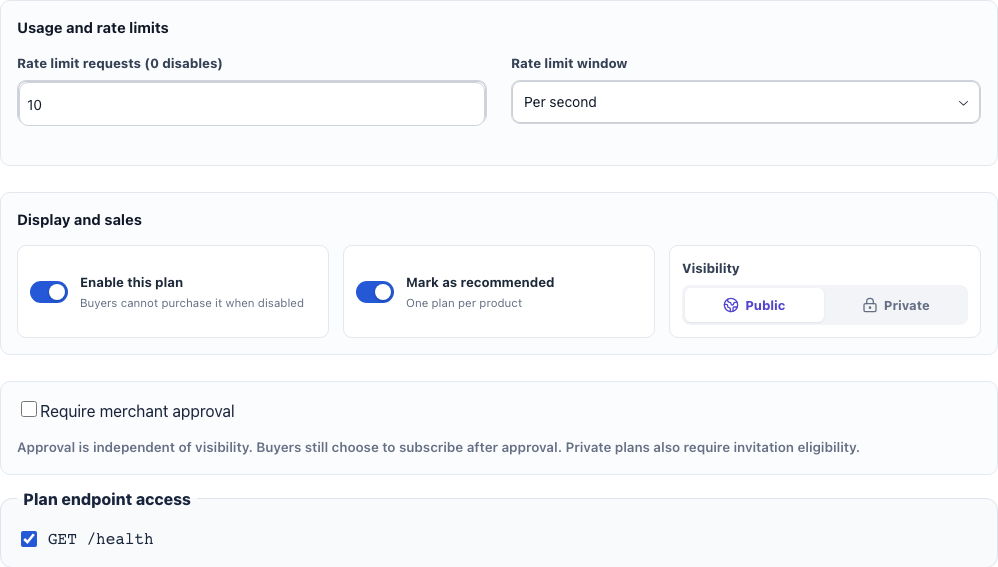
- Open Pricing and expand BASIC. Keep the defaults: a USD 0 monthly base, 10 Requests per month, Hard enforcement, and 10 requests per second.
- Under Plan endpoint access, select GET /health. Keep the plan public and enabled. Imported endpoints are not granted to the default plan automatically.
- Save the draft again. This plan does not charge object overage, so buyers do not need a card to subscribe.
4. Send a real test request
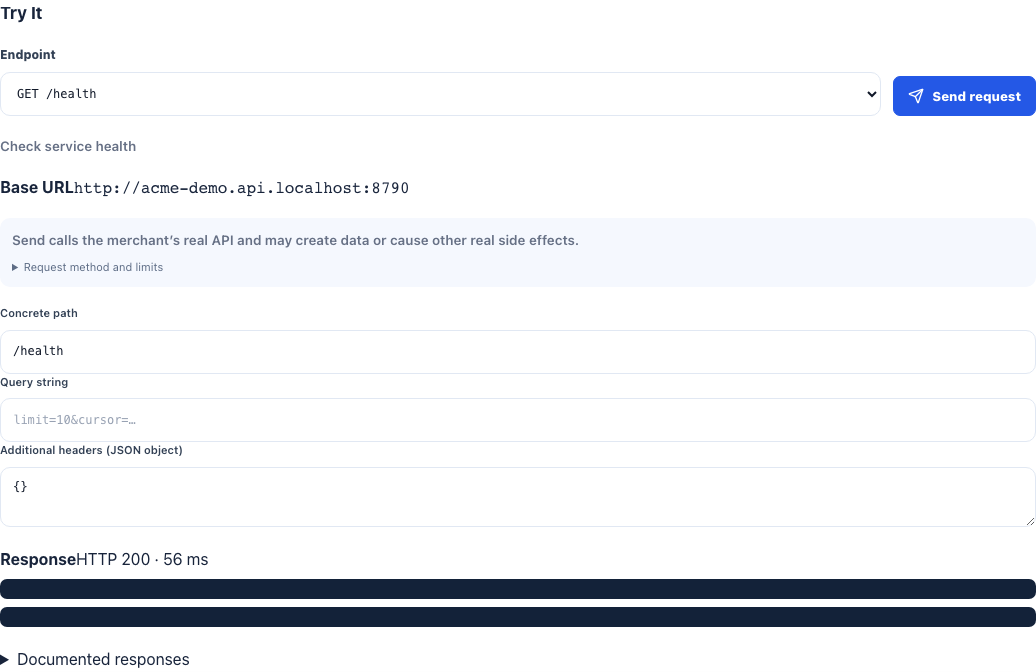
- Return to Endpoint, choose BASIC under Test plan, and select GET /health.
- Send the request. Confirm a 200 response that matches your API and check Saved test evidence.
- If you change the origin, document, or authentication, save and test again. Tests reach your real origin and may incur upstream charges or perform real actions.
5. Preview, publish, and check the buyer page
- Open Preview and check the title, description, BASIC price, Requests allowance, and endpoint access.
- Select Publish. After publication, open the public product page from Products.
- In a signed-out window, confirm the Free trial entry and GET /health documentation are visible. Share the product link and the buyer calling guide with your customer.
Check your result
- Your public product page shows the BASIC free trial and GET /health documentation, ready for a buyer to follow the calling guide.